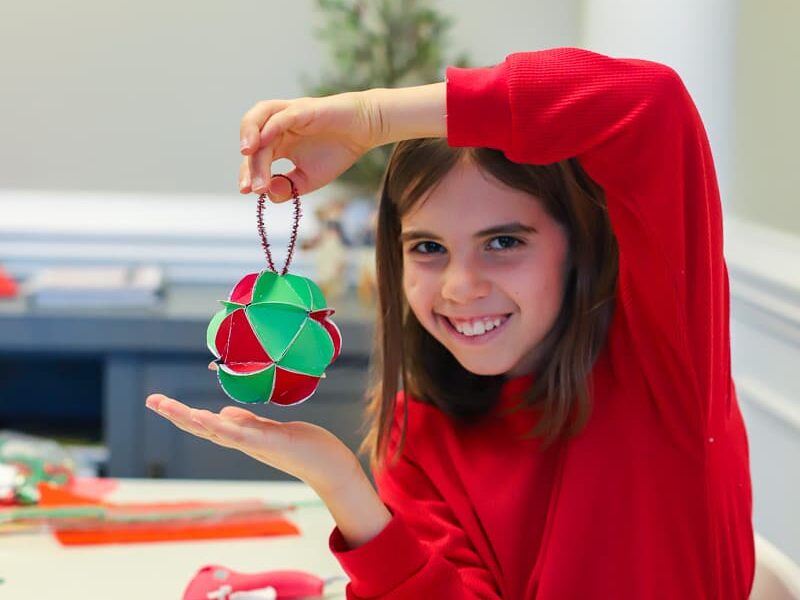
Transform old Christmas cards (or use paint samples) into fun and whimsical ornaments for the tree! This kid-friendly Christmas ornament craft is a great project for kids ages 6+ (and adults, too).
Looking for some more simple Christmas crafts for younger kids?
These three are always huge hits!
On a recent trip to visit my Nannie (my mom’s mom), she shared with us a Christmas craft she’s been making for years. Not considering myself a very crafty person, I was surprised at how much fun I had sitting and working on the ornaments. It lit me up even more to see how much Hailey took to it. When they asked if we could continue making them at home, I knew I had to snap some pictures of the process to share with you as well!
Supplies needed:
- Old Christmas cards (3 cards is enough for one ornament, but the more you have to use, the more interesting the final product will be). You can also use paint samples if you don’t have cards, though they won’t bend quite as easily.
- Pencil
- Scissors
- A hot glue gun (I like using a mini glue gun because it’s easier for the kids)
- Pipe cleaner (1 per ornament); I recommend the glittery kind.
- Glitter glue
- Beads, pompoms, or any other accessory you wish to adorn the ornament with
Process:
- ONE: Gather old Christmas cards or paint samples in the colors you want to use.
- TWO: Create a circle template (cardboard works well for this). Draw a 1.75 inch diameter circle and cut it out.
- THREE: Use the template to draw circles on your cards. You will need 20 circles per ornament. Cut the circle out.
- FOUR: If needed, draw a triangle on the back of each circle. This will show you where to fold in the three sides. Fold and crease the circles upward.
- FIVE: You are going to use five circles for the top/initial base. Using a hot glue gun (you can use regular glue, too, but it just takes longer to dry), glue together two of the circles along one side.
- SIX: Continue this process using five folded circle pieces, until you connect the first and fifth circles together.
- SEVEN: Take a pipe cleaner (you can use a half pipe cleaner or a whole one depending on how large you want the loop to be). Round it in half and stick both ends through the top whole in your circle of five.
- EIGHT: Bend the pipe cleaner to keep it in place, then secure it with hot glue.
- NINE: Now you will glue a folded circle to the loose/outer edge of each or your already connected pieces. You will add five to the next row, then connect those five with another row of five that will go in-between each circle. This part is the most confusing part to explain, but if you can think about it in layers, each layer/row will use five folded circles. The first five create the top, the next two layer interconnect to create the round middle, then the last layer/five circles will bring together the bottom and match the top/first layer.
- TEN: Glue in your last folded circle.
- ELEVEN: Use glitter glue to line all the seams, then find a place to hang your Christmas ornament craft while it dries.
- TWELVE: Use the glue gun to adorn your ornament with fluffy pompoms or glittery beads. Personalize it any way you wish!
You guys know I’m not a craft blogger, but I tried my best! I hope this has been helpful and that you and yours enjoy creating and giving away these special, homemade ornaments as much as we have!


Laura says
So cute! This just unlocked a high school memory —
We made HUGE versions of these “balls” in geometry and my teacher hung them from the ceiling of the classroom with fishing line. It looked really cool. Most were at least the size of a basketball, and some kids went even bigger!
Brittany Dixon says
Oh so neat! I love the idea of hanging them from the ceiling… 🙂
ornaments says
These are absolutely adorable. I will definitely have to do this with my nieces and nephews! I have amazing memories of making my own Christmas ornaments when I was a kid.
ALISON FAUSTINO says
Okay, I feel like middle school kids never get to do crafts, but this is something maybe I could do with my students! Thanks for the idea!